
DIY Space Helmet for kids Astronaut Costume: I am sure that World Book Day was created just to make life difficult for parents, or at least even if that was not the intention it has definitely morphed into that. It can be very time consuming when you are working full time and another thing to add to the to-do list.
So I was very grateful when Charlie had chosen a book by Amazing Pages whose main character is an astronaut. We had a space suit so I thought bingo, nothing more to do. Wrong. A letter from the school specifically asked for a homemade element that would be judged. Because they obviously forgot that as parents we are juggling one hundred other things on a weekly basis. So my good idea turned into not such a good idea. I needed a homemade element. I had to up my game since Charlie has previously requested a Space Helmet that looked like the one in the book.
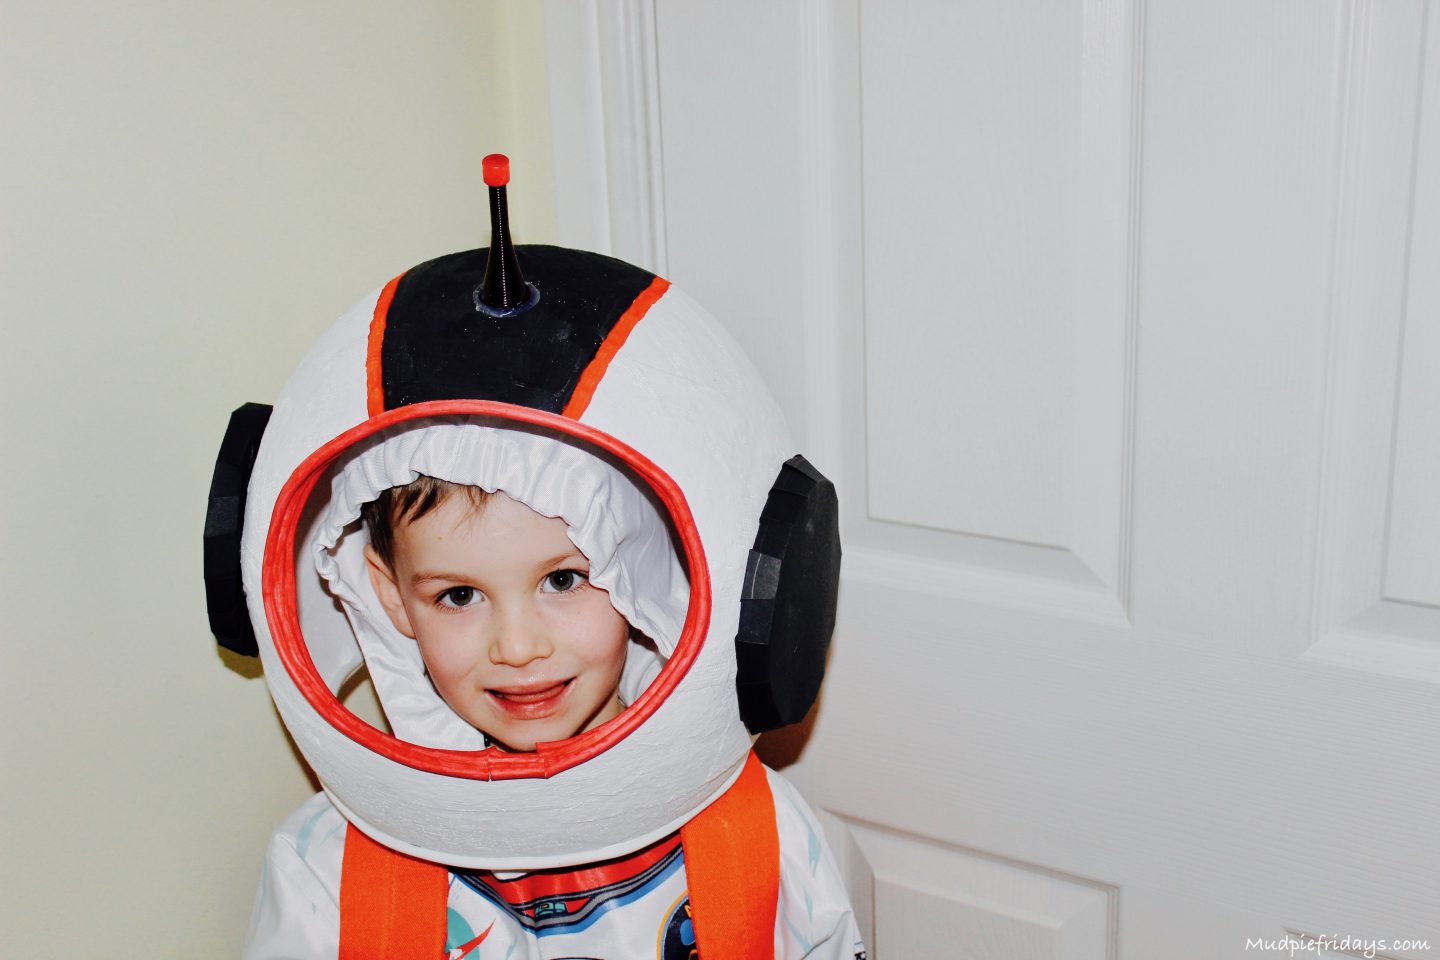
I had no choice but to make that the homemade element. A homemade space helmet. It wasn’t until I started to think about how we would make it did I realise it wasn’t as straightforward as I has hoped. But do not fear. I have found a very simple way of making something that looks half professional… And in fact, three years later it is still going strong and with a quick touch up on paint ready to be used again by Charlie’s younger brother.
DIY Space Helmet
Materials
If you would like to make something similar then you will need the following craft supplies:
- Large Ballon
- Small Mixing Bowl
- Water and plaster bandages
- White, Red and Black Paint (of course you can choose different colors)
- Craft Knife
- Metal doorstop from the DIY store
- Back and Red Sharpies
- Draft Excluder (yes a bit odd)
- Silicone Glue or you could use a glue gun
- Black Card
- Double-sided tape
- Pencil

Method to make your DIY Space Helmet – Step by step instructions
Step One
The first step is to blow up the balloon and place it in the small mixing bowl with the largest part accessible. You will need to make sure that the ballon is bigger than the child’s head. I purposefully chose a ballon that was quite round in shape rather than oval too. Cut the plaster bandages into various lengths and start to put these onto the ballon. The bandages will have little holes in them where there is no plaster, so you will need to use a little finger to rub the plaster over them. Repeat.
We covered two-thirds of the ballon in two layers over two nights. It was easier to let them dry in between as it meant it was not too soggy and easier to see where you had already placed the bandages as they go a darker colour when dry. I found using the plaster bandages a lot better than using paper mache. Just remember to leave a wide enough neck opening at the bottom.

Step Two
Pop the ballon this was definitely the best part. Hubby then used the craft knife to level off base of the helmet and cut out a window where the visor would be. I found it quite difficult to cut the plaster. Take it slowly so not to make any mistakes. Don’t worry too much if it is quite rough on the outside. It won’t be so noticeable once it is painted. If you are really concerned then you can use some very fine sandpaper to level out some of the bumps. But be careful not to rub too hard.
Step Three
The draft excluder we chose had a sticky side which meant it was easy to cut to size and then attach it around the bottom of the helmet and around the visor area. This is a tricky step so you may need an extra pair of hands. And measure it first before cutting as it is difficult to hide any mistakes. If you can not find one with a sticky edge then you could secure it with a hot glue gun.

Step Four
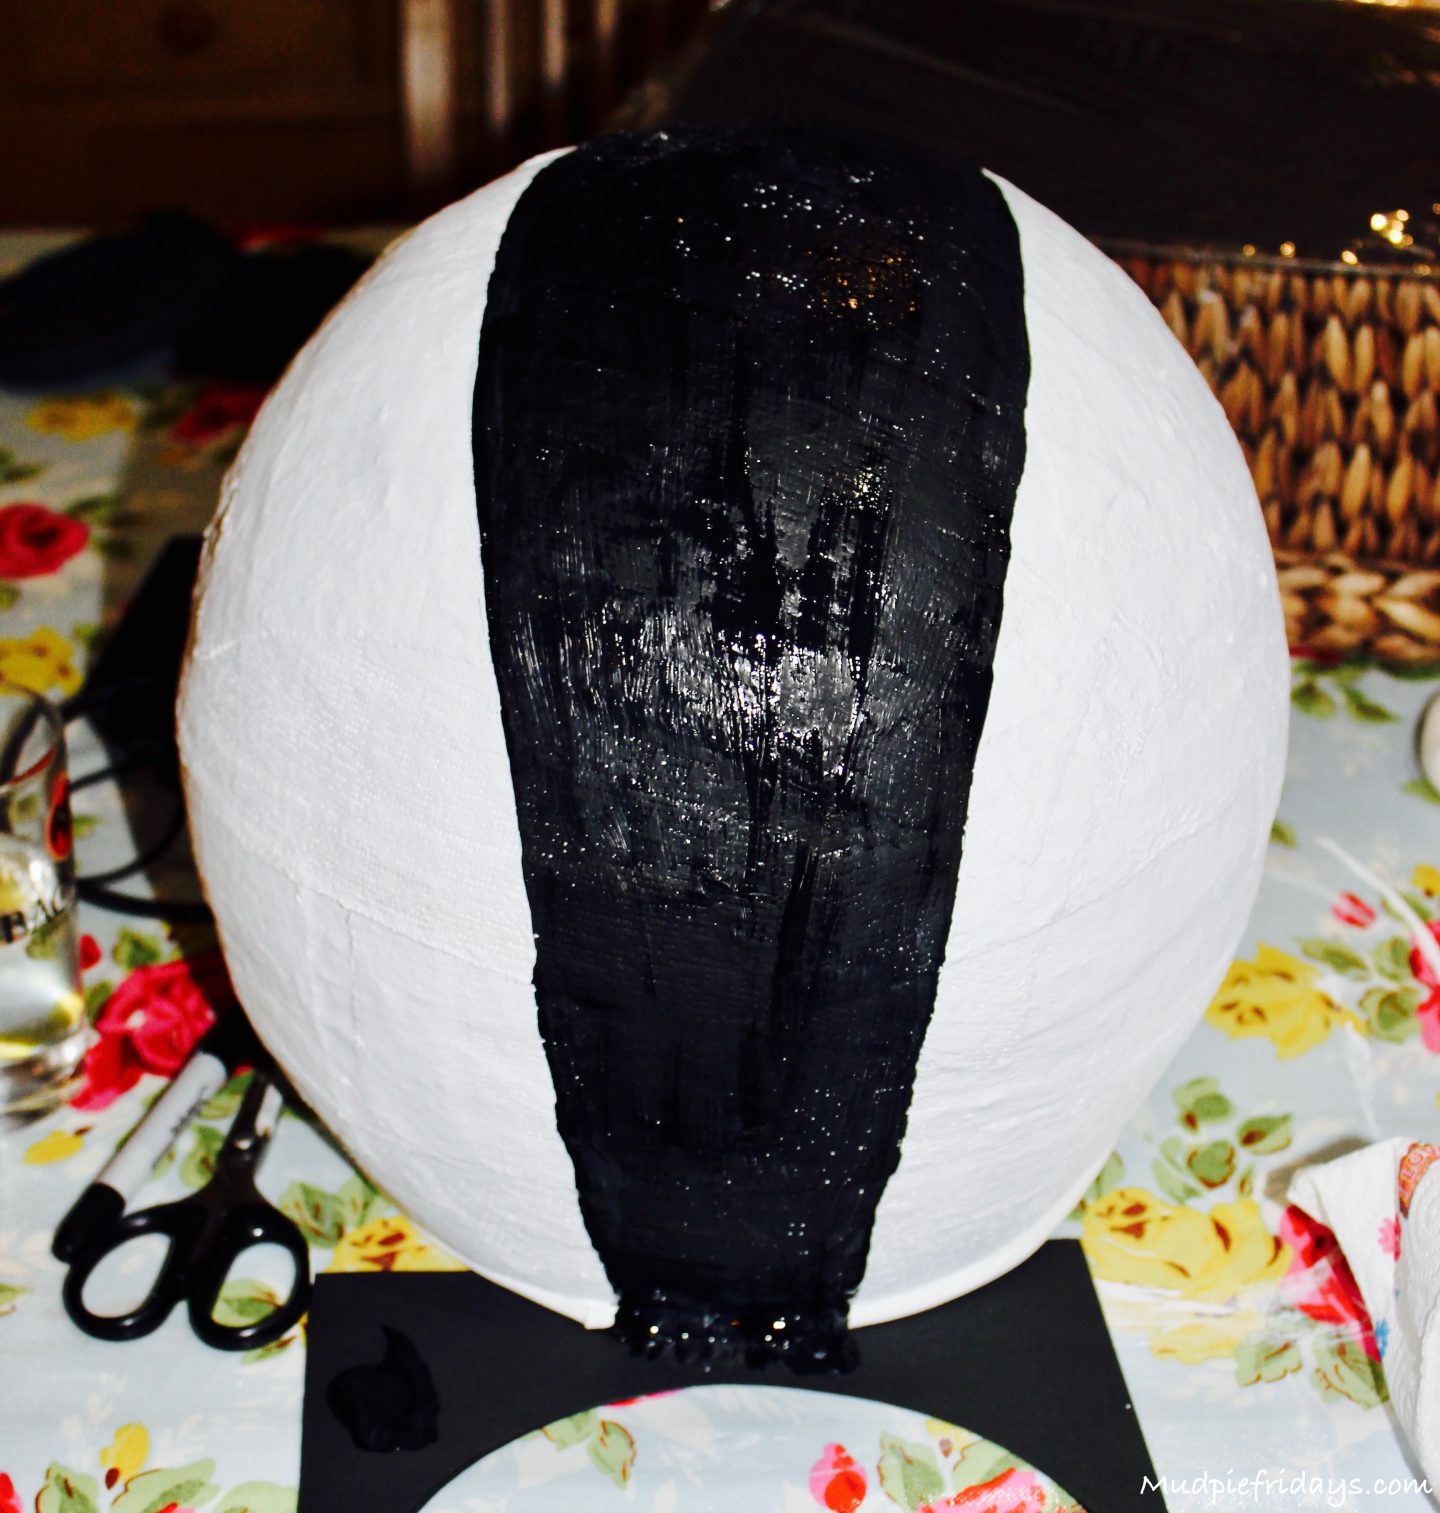
Using a good quality acrylic paint cover the helmet in white paint. You may need two coats. Or if you fancy you could use silver spray paint. As are were copying the helmet from the book Amazing Pages I also use paint to add some finer details. And painted on black and red stripes.
Step Five
Once dry I used a red sharpie to colour in the draft excluder around the front of the helmet. Be careful not to stray onto the white helmet.

Step Six
For the antenna on top of the helmet, I used the red sharpie to colour in the tip of the door stop and then a blank sharpie for the rest of this. Silicone glue worked well to attach it onto the helmet in the middle. Add some NASA logos if you want to add a little extra interest.
Step Seven
Create two side pieces by drawing around a small bowl onto a piece of black card. Select a slightly bigger plate and draw around this again. Cut the larger of the two circles out and then snip down to the second circle and fold these tabs over. Fix double-sided tape to the cardboard tabs and push these gently against the helmet. You need a good quality double-sided tape for these.
Step Eight
We discovered that the helmet was a little big for Monkey so to make it more suitable we folded up some tissue paper to make a little pad and used this in the top. Securing with silicone glue. If you have any old fabric, a strip of foam or wadding you may want to add this to it. The best thing about doing it this way is that you can adjust the size of the pillow to make sure it fits perfectly. It also gives the wearer some protection from the top of the helmet.

So there we are our very own DIY astronaut helmet and one happy little boy. Even happy to pose for a first picture. Something that looks pretty complicated is actually very straightforward to make. Saying that next year I am not sure if they make a homemade element that is quite so time-consuming! Working full time meant I could only spend evenings on it. Having to let the plaster dry did take longer than expected. I would allow a week to complete the project if like me you can only do it in the evenings. But what I would say is that it is extremely satisfying seeing the fun costume at the end. And the little smiley face when they put it on.
If you enjoyed this post then you may also like our homemade jet pack and oxygen tank. With our own space helmet, we are all set to become space explorers and travel into outer space.
READ MORE – Make your own Spaceman Rocket Pack
Did your children dress up for World Book Day? How about homemade astronaut Halloween costumes? Let me know your favourite homemade costumes in the comments below.
If you have enjoyed this post then you may also like to read all about our trip to the National Space Centre.

If you’ve liked this post please follow me on my social media channels:
Mudpie Fridays: Twitter | Instagram | Facebook | Pinterest | LinkedIn







23 Responses
HOw awesome did this project turn out??? Wow! Nice job. And thank you for hosting! #BloggerClubUk
Oh you are good! I am hopeless with crafting etc but this looks amazing xx #bloggerclubuk
Fantastic tutorial! My kids will LOVE this, thank you!
I absolutely love your craft ideas as they are never too obscenely complicated and the materials are easy to find. I am definitely going to do this with my littlest one – he’ll love it! What a fab idea. That’s an Easter hols activity sorted. Thank you! #bloggerclubuk
This is such an awesome craft thing to do. You’ve made it look easy and the instructions are really easy to follow. i know exactly where to come in the future if BattleKid comes to me and tells me he wants a pace helmet! It looks really professional too, you’ve done an amazing job! #bloggerclubuk
Wow this is so clever! I don’t have a creative bone in my body so the poor kids never get to do crafty things 🙁 #bloggerclubuk
This is amazing! You win serious mum points!
#BloggerClubUK
Oh my word now that is an impressive effort!! Our theme was Dr Seuss and my two went as Thing1 and Thing 2 which was pretty easy – t-shirts, blue hair and of course a red/blue tutu for Madam 🙂 (I did make the tutu though!)
I’m still amazed that you made this, it’s brilliant. Not only that but you did it whilst holding down a job and having a baby. You are super mum x
That would have been perfect for last year’s Camp Bestival as it was space themed! Great costume x #BloggerClubUK
That is literally the coolest hing I’ve ever seen! I love it, and you’re right it totally do-able! #bloggerclubuk
You guys did an amazing job! I’m not familiar with this World Book Day, though…probably because my daughter isn’t in school yet. Anyway, my favorite part is the use of the door stop as an antenna! That is such a creative idea 😀 #bloggerclubuk
This is brilliant and what a great way to get the kids involved in making their own costumes! #bloggerclubuk
Wow that looks amazing!! Such a good idea and I’m sure there’s endless fun to be had playing with it afterwards. My kids would love this. #bloggerclubuk
Wow this is so effective! #bloggersclubuk
Wow! Well done you! That is awesome. You’re definitely a crafty mommy.
#bloggerclubuk
Lovely! That looks like one happy little boy there with his space helmet! #BloggerClubUK
WOW! I saw this on Instagram and couldn’t wait to read how you did it. You are SO clever! I’m going to try this next week! #BloggerClubUK
This is brilliant! World Book Day sounds more and more time consuming! Whatever happened to the days when the homework was for the kids rather than the parents lol
Thanks for linking up to #BloggerClubUK 🙂
Debbie
Just realised I thanked you for linking up duh lol!
Your talent never ceases to amaze me! I have never made anything this complex in my life. What a good idea to use a draft excluder around the helmet opening! Monkey is one lucky boy to have such a fab costume made for him with love. #BloggerClubUK x
Feeling so frustrated! I am doing two coats of the plaster strips and the first coat looked great. I let it dry overnight but when I’m putting down the second layer it is pulling up chunks from the first layer and looking icky. Any tips? Does it look ok in the end?!?
Brilliant idea ! Not as hard as I thought – we’ll have a go too